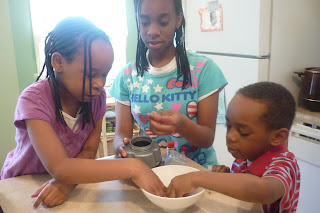
I purchased a Rock Tumbler sometime in October when they had a sale going on at Micheals. I finally pulled it out for my kids to give it a try before I did this project with the preschoolers. The process of rock tumbling is not a quick one. In fact we are still working on this project. In effort to keep my post short this will be part one of this project. The question that was asked to me by the children is What other things can you use rocks for?
Step1: Starting to Tumble
The stones that came with the rock tumbler. Also a small chart was included to help identify what type of rocks they are.
First rinse the stones.
Fill the barrell with the stones.
Add step 1 grinding powder.
Cover the stones with water.
This is what it looks like inside of the barrel.
Now the rocks will tumble for two days. I want to share with you that this rock tumbler was relocated at least three different times due to the noise it creates. If you plan to do this for the first time I suggest you find a place where noise won't be a factor. DJ wanted this to be in his bedroom, he quickly requested it to be removed .
Step 2: Continuing to Tumble
Pour the contents out of the barrel. It best that you use a strainer, but after looking at this I kinda was turned off to use my strainer. I didn't know if I would be able to ever look at my strainer again the same way. Lol!
Rinse the stones.
Place the stones back in the barrel.
Add step 2 Fine grinding powder. Select four days for your rocks to tumble.
Now we are on Step 3 Polishing. I think by next Sunday we should have some beautiful rocks to show you and wonderful examples to show how we can use rocks. To see other activities that children have been doing with science pop over to Science Sunday hosted by Adventures In Mommydom.


My daughter used to love her rock tumbler and she used it until it wore out. I should get another one for the little boys. Thanks for reminding me. I love all the varied activities you do!
ReplyDeleteGreat activity :-)
ReplyDeleteI would like to have rock tumbler like yours!
Our rock tumbler was quickly discarded partway through the first try. We couldn't get it open without prying it apart in such a way that it broke.
ReplyDeleteI'm looking forward to trying this with my kids at some point.
I've been wondering if these tumblers REALLY work...and how they work! Fun!
ReplyDeleteJessy - Science Sunday
http://oursideofthemtn.blogspot.com